
YouTube
Rumble
Can a dough proofing box help you make consistent bread and bread goodies?
Many factors contribute to the perfect homemade bread. You can have all the same ingredients, yet not have the same success with two different loaves of bread. Why? Because the humidity and temperature of your baking area and flour can vary from day to day.
One way to have a more consistent environment for your bread is by using a proofing box. They are also called a dough proofing box, or a dough proofer. A dough proofing box keeps your rising bread dough at a consistent temperature and humidity level. This consistency of temperature and humidity helps you create consistent loaves of bread, regardless of your weather and humidity in your kitchen.
Ideally, you want the temperature to be between 72 and 90 degrees with a 50% to 75% humidity. The exact temperature depends on if you’re using yeast or sourdough. Plus, the speed you want the dough to rise. Remember, bread making isn’t about speed. The slowness of rising dough adds to flavor, especially when you’re using sourdough. Also, if you raise the dough too fast, it could collapse. The proofing box gives you temperature and humidy consistency that helps you when making bread.
You can buy a proofing box or make one. I decided to make one out of items I already had around the house. Let me show you how I made mine, with some options if you need to buy anything.
Equipment:
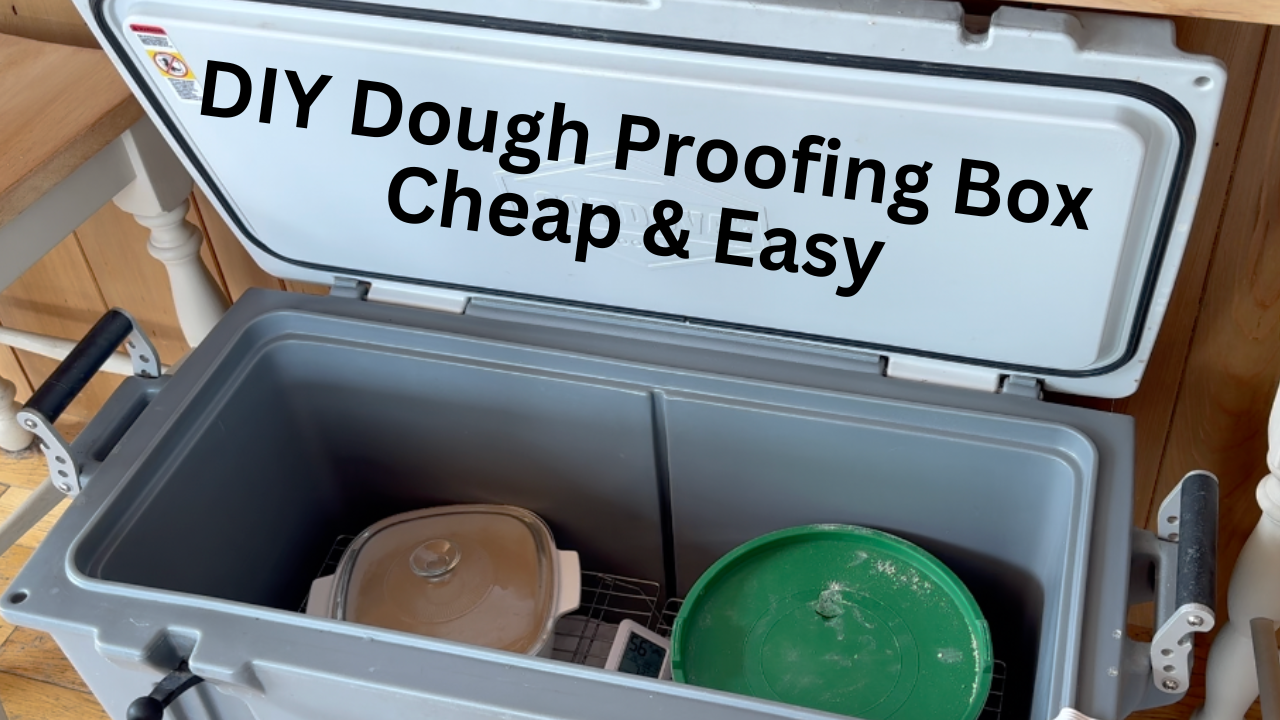
- A container that can seal and is large enough to set your dough into. I used an unused cooler. You can use a cooler bag or a styrofoam cooler, which are super cheap to find.
- A heating source: I had two options to use. Either my plant mat heater, or a heating pad. My plant mat heater has a temperature gage on it, and adjustments. It’s almost planting time, so I didn’t want to sacrifice the plant heating mat. We never use our heating pad, and if we needed it, I knew exactly where it was. My heating pad has a temperature control of low, medium, high and turns off after two hours. Since it doesn’t have an actual temperature gauge, I needed to play with the setting and have to check the box throughout the day.
- Thermometer with humidity is ideal. I have one because of starting our plants inside. You can also use an over thermometer or meat thermometer if they go low enough. If you can track the humidity, that gives you an edge, buy if not, you can feel if there is more humidity in your box than outside.
By me humidity is more of a concern in the winter, because we heat with wood, which dries everything out. - A bowl of water, which sets on the heating pad and causing more humidity in the box.
- A tray or rack to set the bowl of dough onto. I used cooking cooling racks. This way, the heat can come up from the heating pad and the bowl isn’t sitting right on the heating pad.
- A bowl with a lid. You can use any bowl and put a plastic wrap. We don’t have plastic wrap, but I have a bowl with a lid. I’ve also put a moist towel over the top of the dough bowl, but you have to check on it more.
I set the dough in bowel on the rack and close the lid. Throughout the day I check the temp and humidity. I don’t worry about the humidity as much as I do about the temperature. I’ve learned when I can turn off the heating pad and the inside still stays within the correct temperature range.
You don’t always need a proofing box. However, I value the predictable rise of my dough, thus avoiding guesswork.
Happy bread making.